Sensor Details#
This page covers the sensor details. It allows you to specify the unit of measurement for each sensor and to add required meta-information to some special sensors (e.g. orientation is needed for tilted irradiance sensors).
Overview#
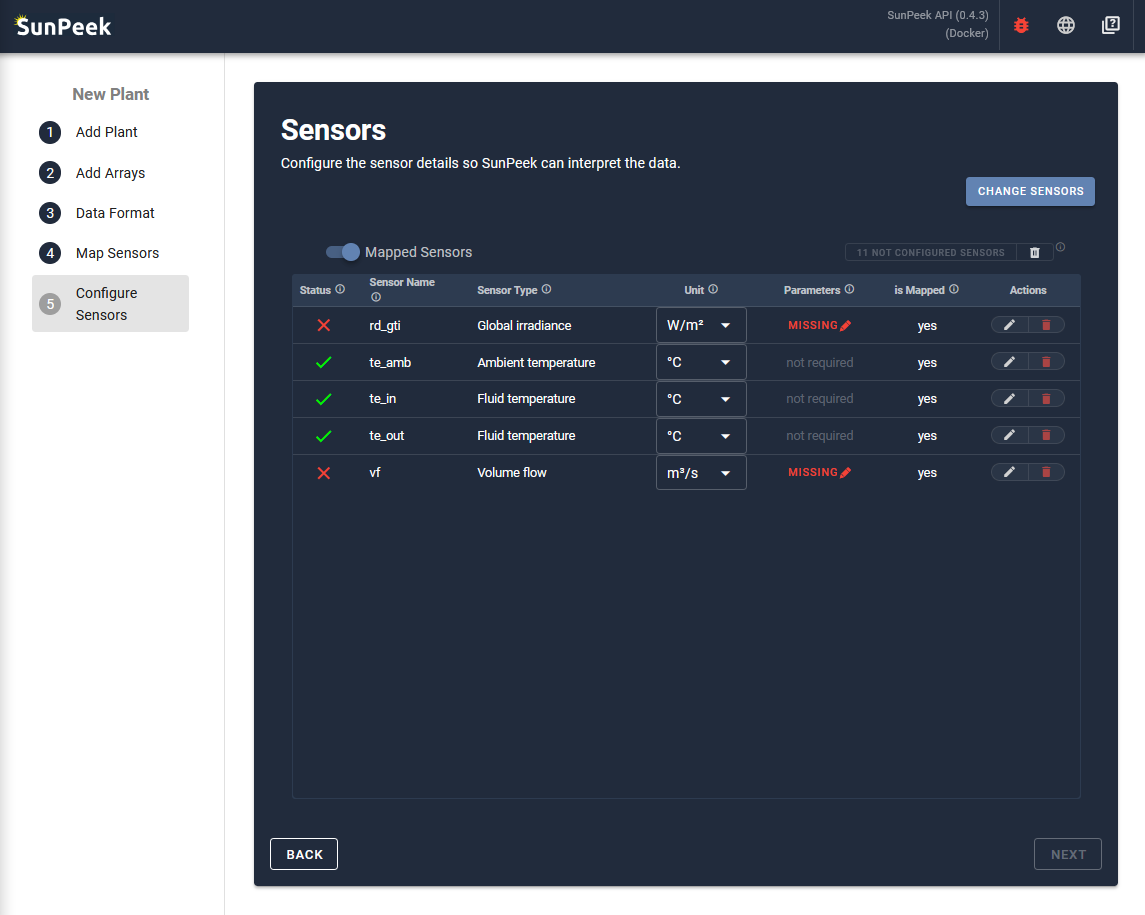
The page displays all the sensors of the current plant that are known to SunPeek as a list. For each sensor, it allows to check and adjust additional parameters that are required for SunPeek:
The first column shows the Status of the sensor
green. The sensor has all the information needed to interpret the data.
red. The sensor is missing some required information to interpret the data AND the sensor is mapped.
gray. The sensor is missing some optional information, but is currently not needed for SunPeek (Data will still be stored).
The second column shows the Sensor Name as it appears in the CSV data that was provided during sensor registration in the Data Format step.
The third column shows the Sensor Type that is used within SunPeek. Note that the sensor type is automatically set in case the sensor is already mapped to a component. Hence, the sensor type can only be choosen for sensors that are not assigned to SunPeek yet.
The fourth column shows the Unit of measurements. It is only available if the Sensor Type was already selected. Based on the sensor type, potential units are automatically provided as a dropdown list.
Some sensor types require additional parameters that are needed so SunPeek can fully interpret the data from the sensors (e.g. orientation of irradiance sensor). Hence this column allows to enter the information if you click on the “Missing” button (if the information is missing) or the “Edit” button (if the information is already set).
Finally, the sixth column shows the binary information whether the sensor is used in the sensor mapping or not.
Hint
By default, only the mapped sensors are shown, as only mapped sensors are actually used by SunPeek. If a user wants to see and adapt also other sensors (which is optional) the user can click on the “Mapped Sensor” toggle on top of the list to display all sensors.
Checking the Units#
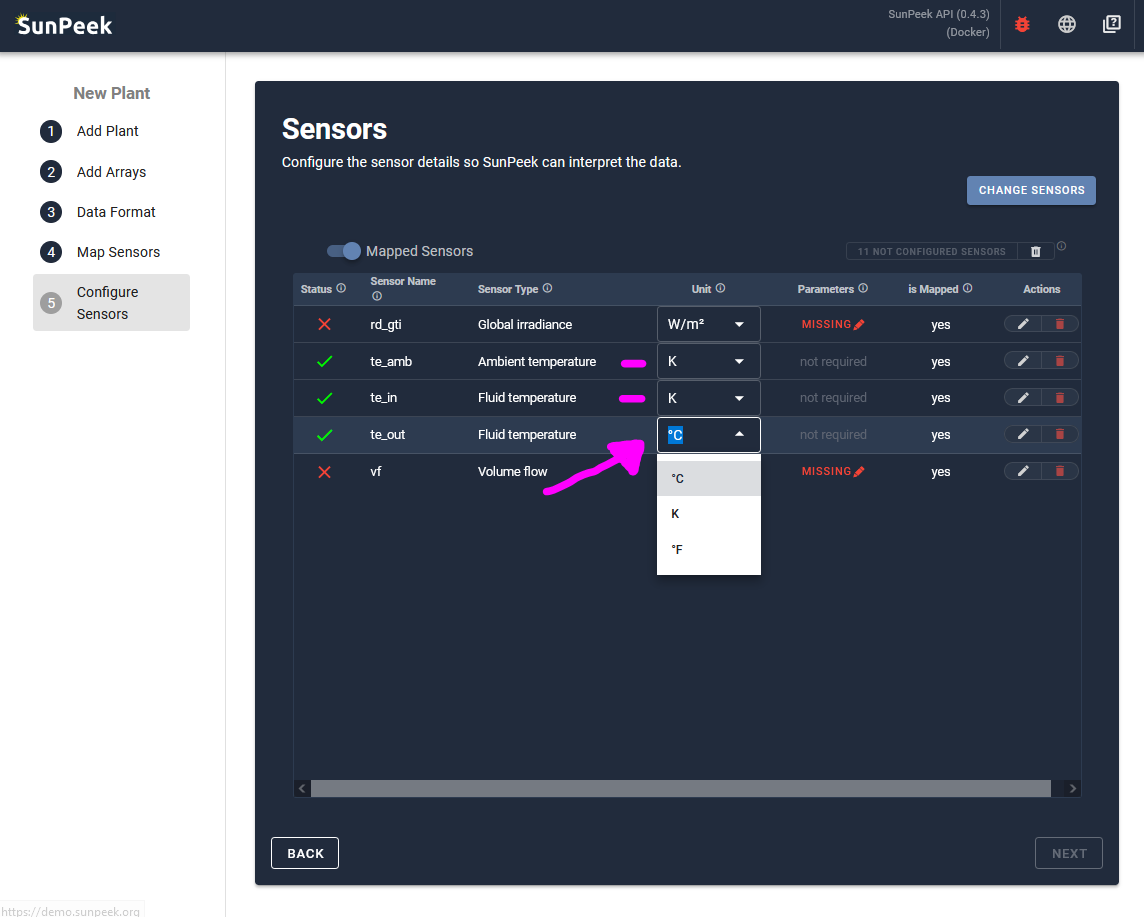
In a first step during the configuration of the plant, it makes sense to check the unit of the sensors for all the mapped sensors.
- In the case of the demo plant:
Irradiance is recorded in W/m² which matches the SunPeek default.
Volume flow is recorded in m³/h which matches the SunPeek default.
Temperatures are recorded in Kelvin - however, SunPeek uses degree Celsius by default.
Hence, we change this by clicking in the individual dropdowns and selecting: K
Missing Paramters#
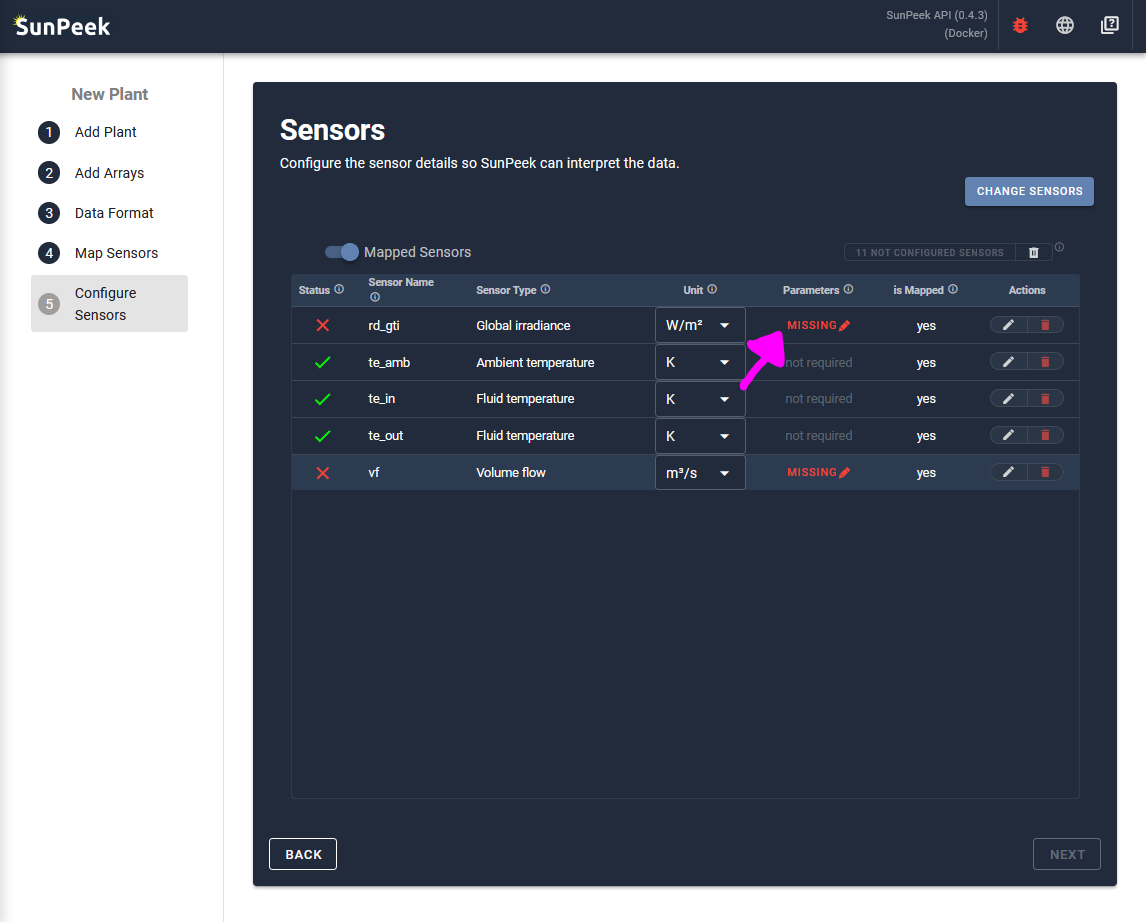
Some parameters might show a “MISSING” message in red in the Parameters column. In this case, parameters can be set by clicking on the missing message to open the Sensor Editor.
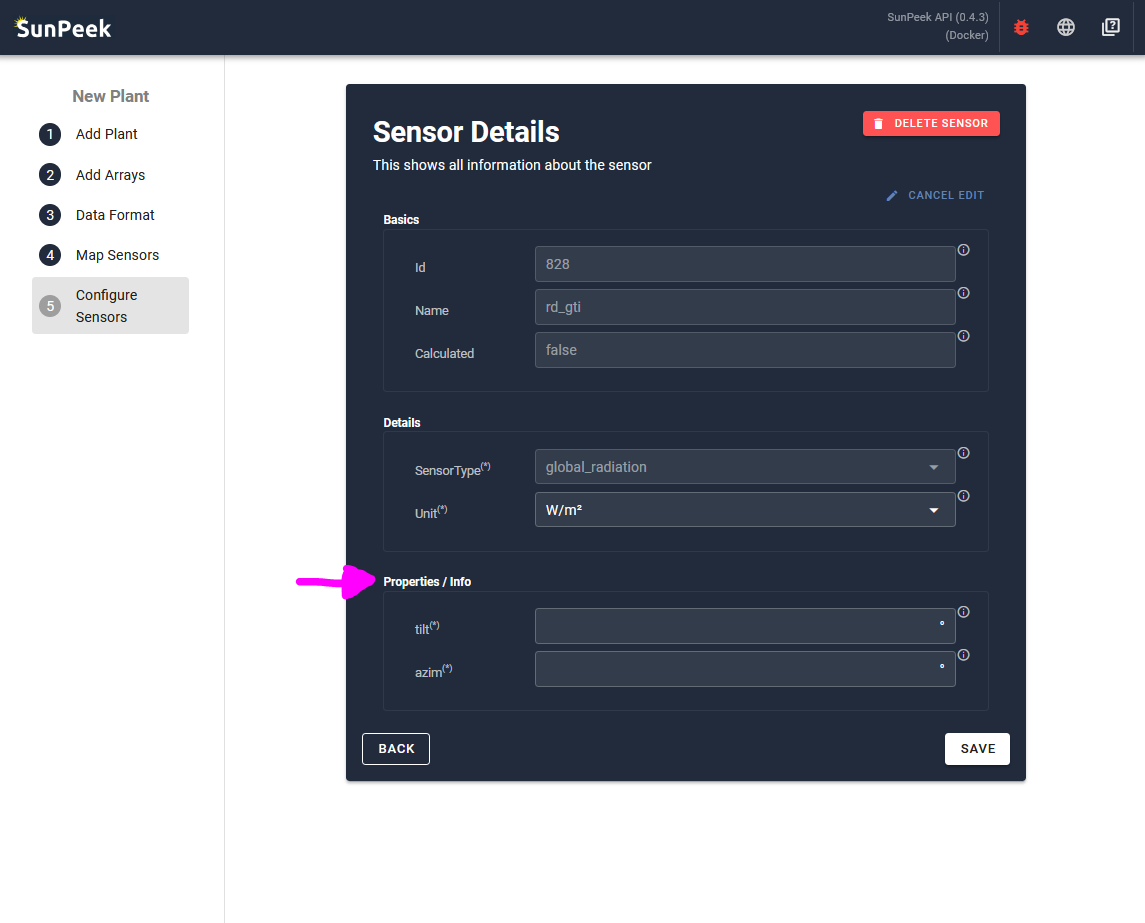
On this page, all information regarding a sensor are displayed:
ID: The internal ID of the sensor (fixed).
Name: The name of the sensor according to the data uploaded
Calculated: A boolean value indicating whether the sensor is calculated or recorded (fixed).
Sensor Type: the sensor type of the sensor. (fixed if sensor is mapped).
Unit: The unit of the sensor
Properties / Info: Additional parameters for the specific type of sensor. The inputs in the section are hence different for each sensor type.
Hence, this input form allows to change the paramters (also called properties or info) for the selected sensor.
- In the case of the demo plant:
We want to assign the following parameters to the sensors
rd_gti:
tilt: 30° (tilt of the sensor)
azim: 180° (orientation of the sensor. = south)
vf:
position: 0 (position of the sensor in flow or return. = in return)
Confirm#
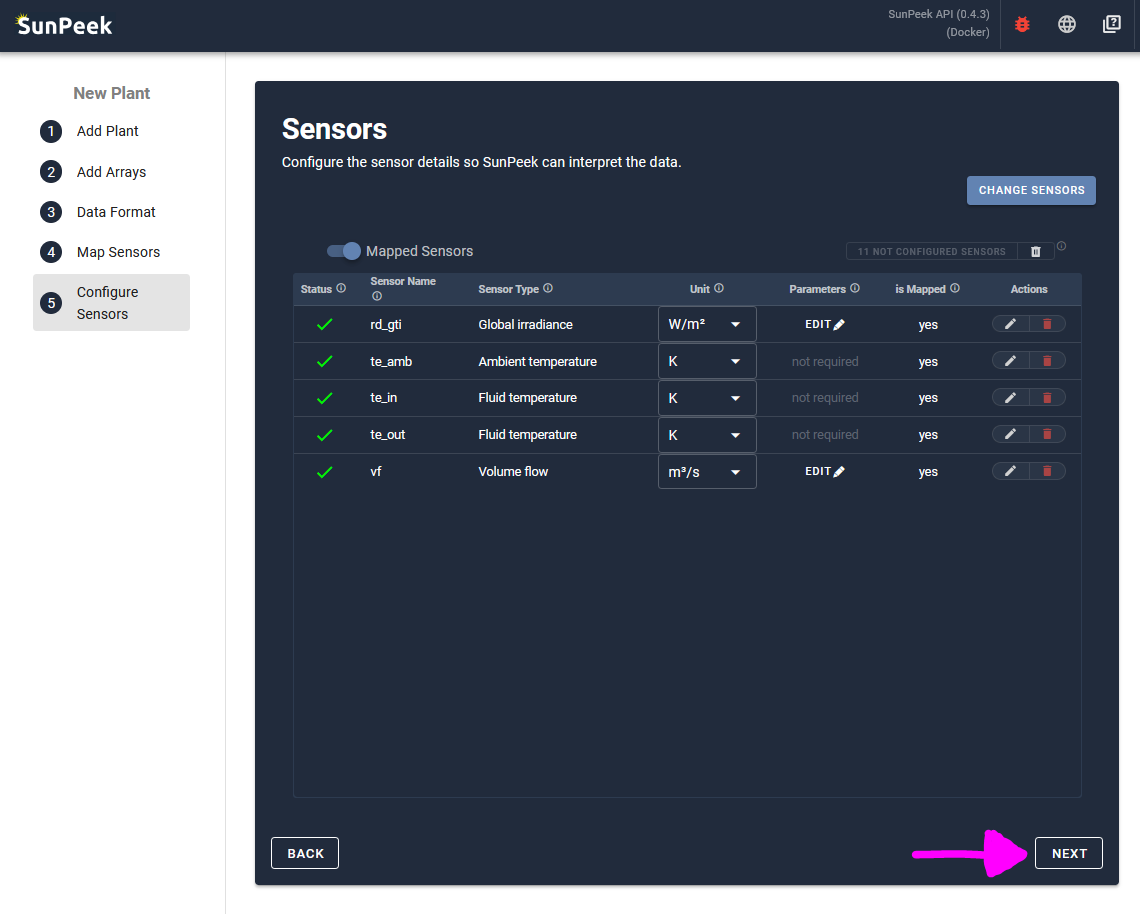
After checking the units and assigning all parameters to the required sensors, the NEXT button can be clicked to finish the plant configuration.
Note
There is also a button on the upper right to Delete all not configured sensors
This allows you to delete sensors, which are currently not used by SunPeek. This will increase the speed of parsing data as the deleted sensors will not be parsed. However, it also means that all the data needs to be important again in case the deleted sensor is needed at a later time.