Data Upload#
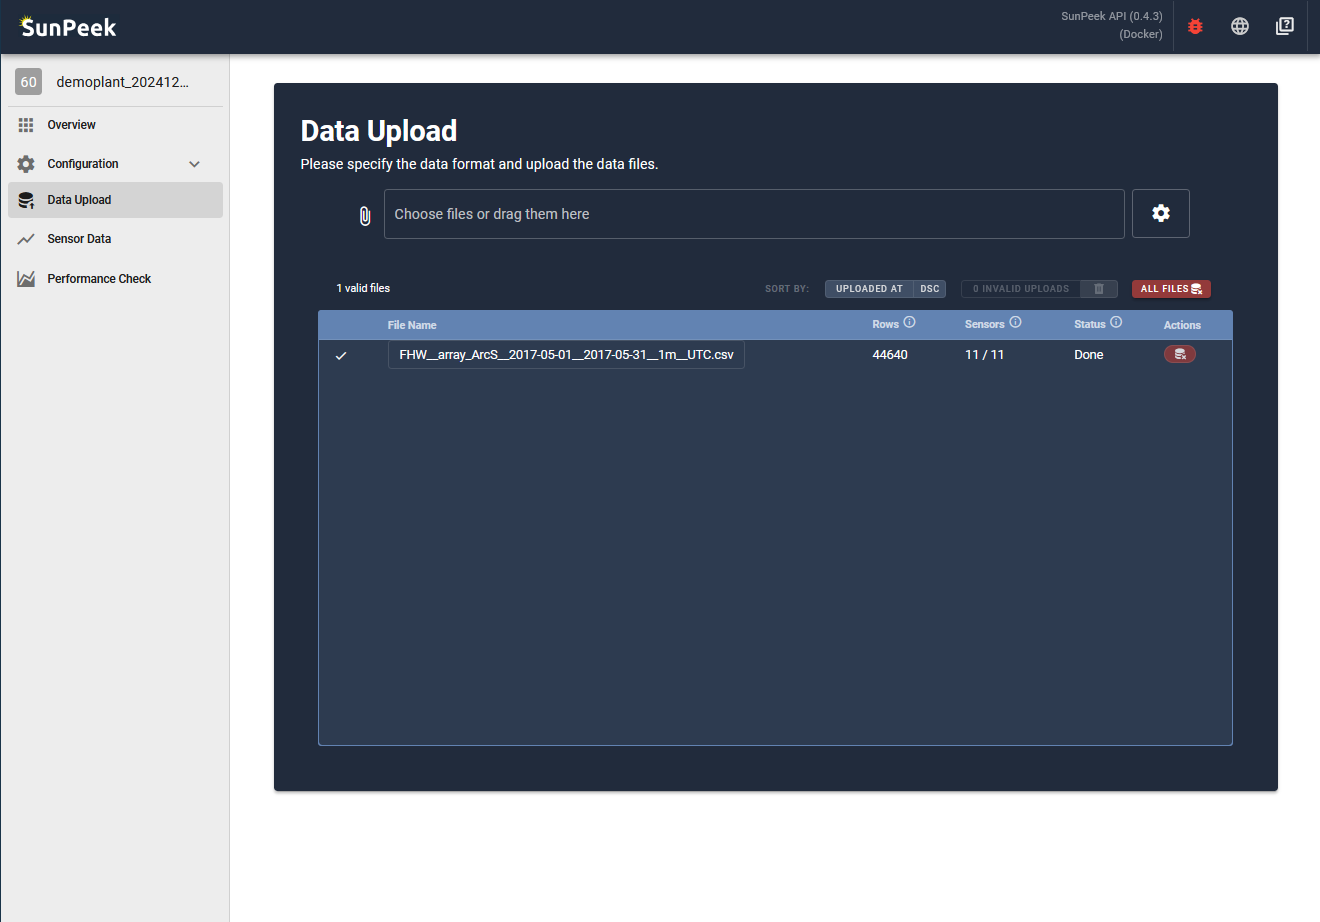
The Data Upload page allows user to upload data to SunPeek. The data is then stored within the SunPeek database so it can be retrieved fast on demand. Once data has been uploaded, every uploaded file will appear in the list, as shown in the screenshot above.
The page provides the following information for each uploaded file:
Name |
Description |
|---|---|
File-Name |
The name of the file that was uploaded |
Rows |
The number of rows inside the file = the number of timestamps in the file |
Sensors |
The number of sensors identified in the columns of the file, in comparison the the known sensors based on the sensor information (Sensor Details). |
Data Start |
Minimum timestamp inside the provided data |
Data End |
Maximum timestamp inside the provided data |
Size |
Size of the file |
Uploaded at |
Time of upload (server time) |
Status |
The status of the upload:
|
Actions |
Provides buttons to delete a file (deletes data between start and end date of the file) and inspect it (only if recently uploaded) |
How to Upload files?#
- If you follow the Tutorial:
you can use this file here which contains 1 month of FHW data.
and simply drag and drop the file in the file-input
UPLOADING
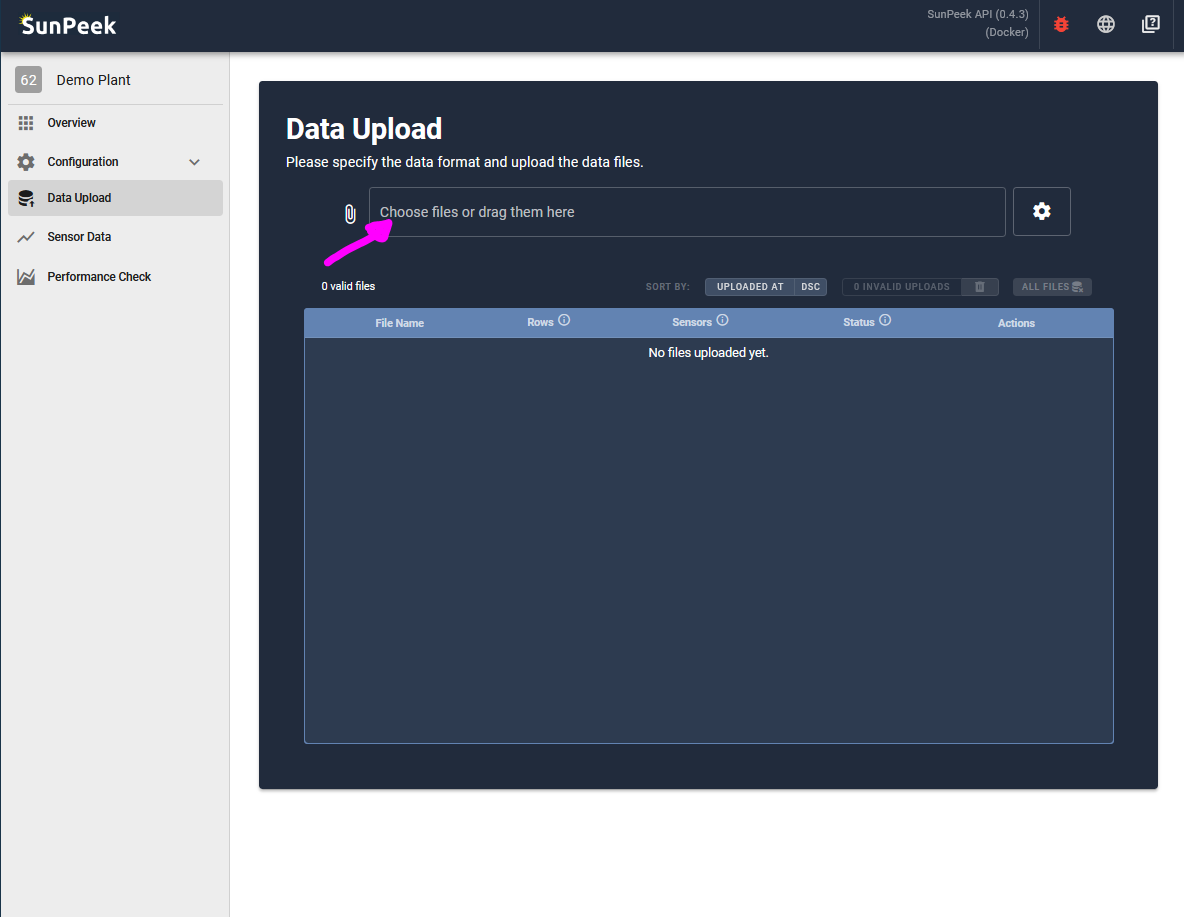
If you have not uploaded any data yet, the list will show “No files uploaded yet”. In this case you can simply drag and drop a file, or click on the file-input at the top to select a csv file. This file should ideally match the format you specified during the data-format step in the configuration (Data Format), (see further below to adapt the data format)
PARSING
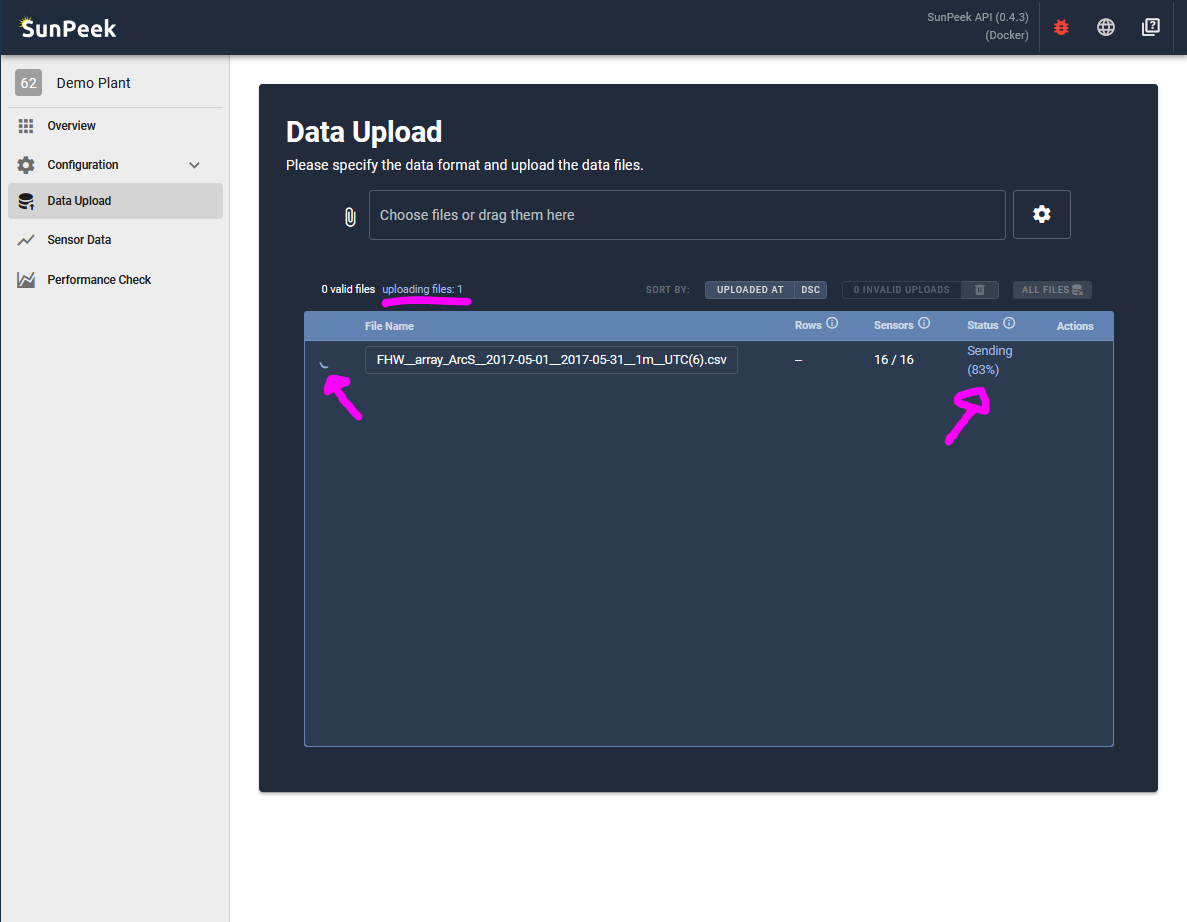
Upon selecting a file, the upload will start:
Sending: First, the data will be send from the browser to the SunPeek Backend.
Parsing: Next, the backend will parse the data and check if everything is ok.
Error: If there is an error, the upload is terminated without storing any data (see section further below).
Done: Finally, (if there is no error) the data will be saved in the database for easy retrieval and further use.
After this, everything is ready to inspect the uploaded data (Sensor Data) and run the Power Check (Run the Power Check).
How to react to errors?#
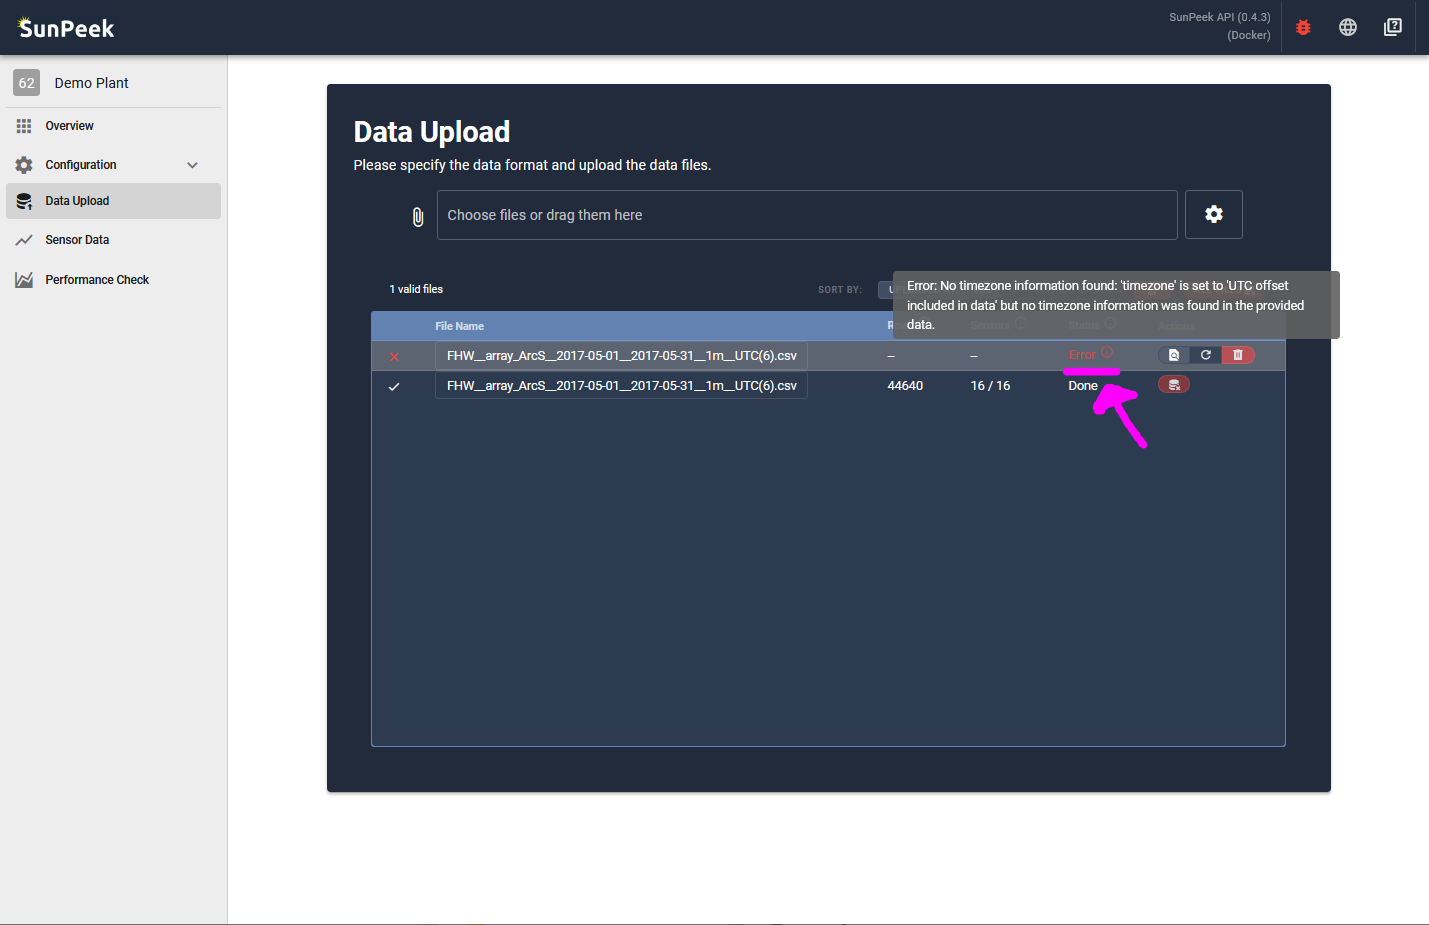
If any problem arises during uploading a file, SunPeek will stop and show Error as the Status of the upload. By hovering over the red error symbol, you can find out more details about why the upload failed. (In the case shown in the screenshot, the date format of the file does not match with the settings and SunPeek cannot understand the timestamps)
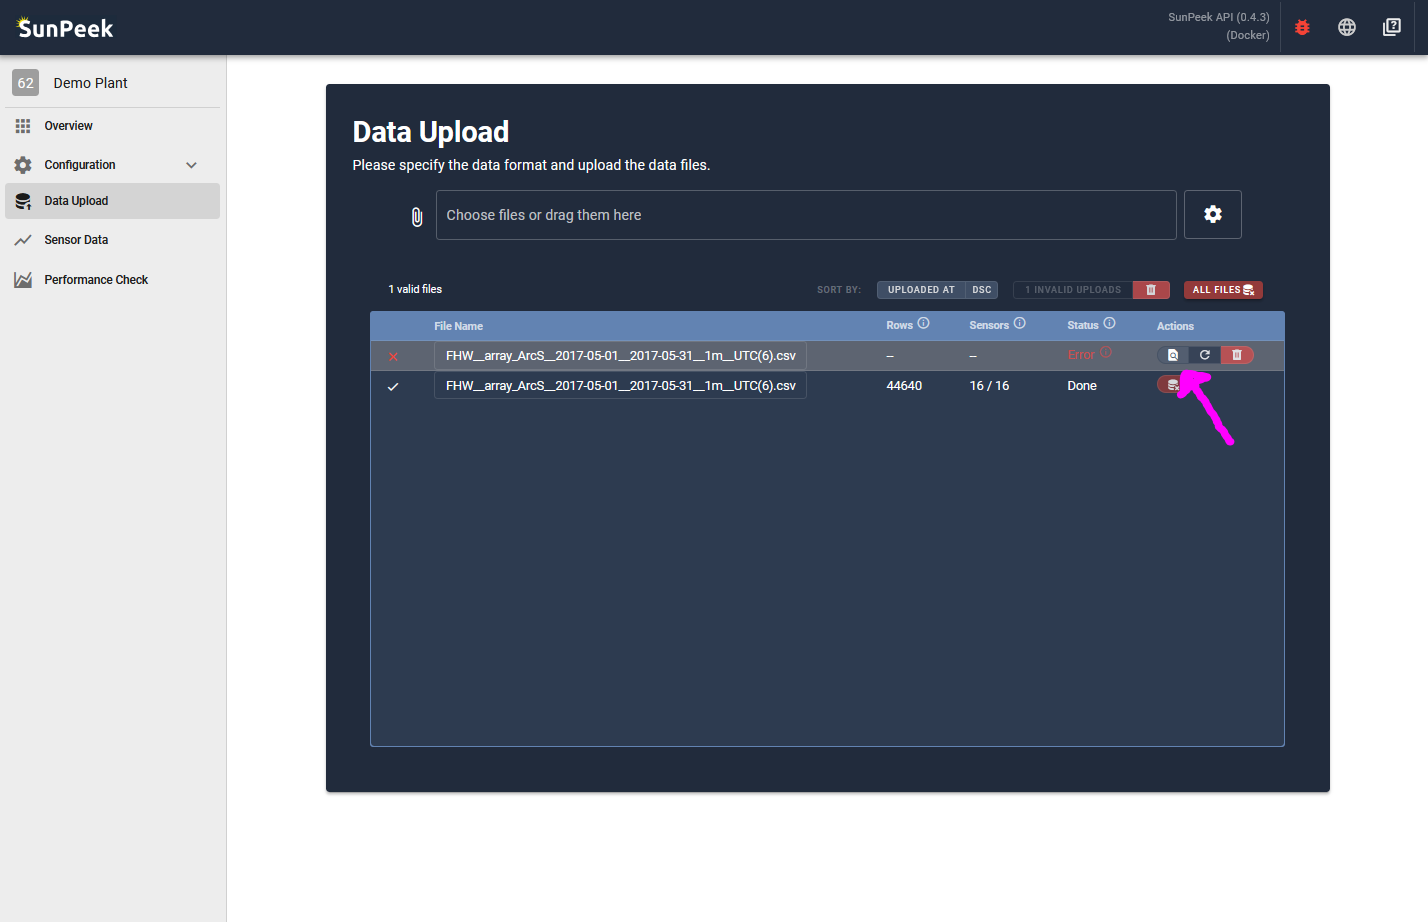
If you just uploaded the file (so it still available in the browser memory) you can use the inspect button to inspect the file, or you can click on the retry button to try to upload the file again.
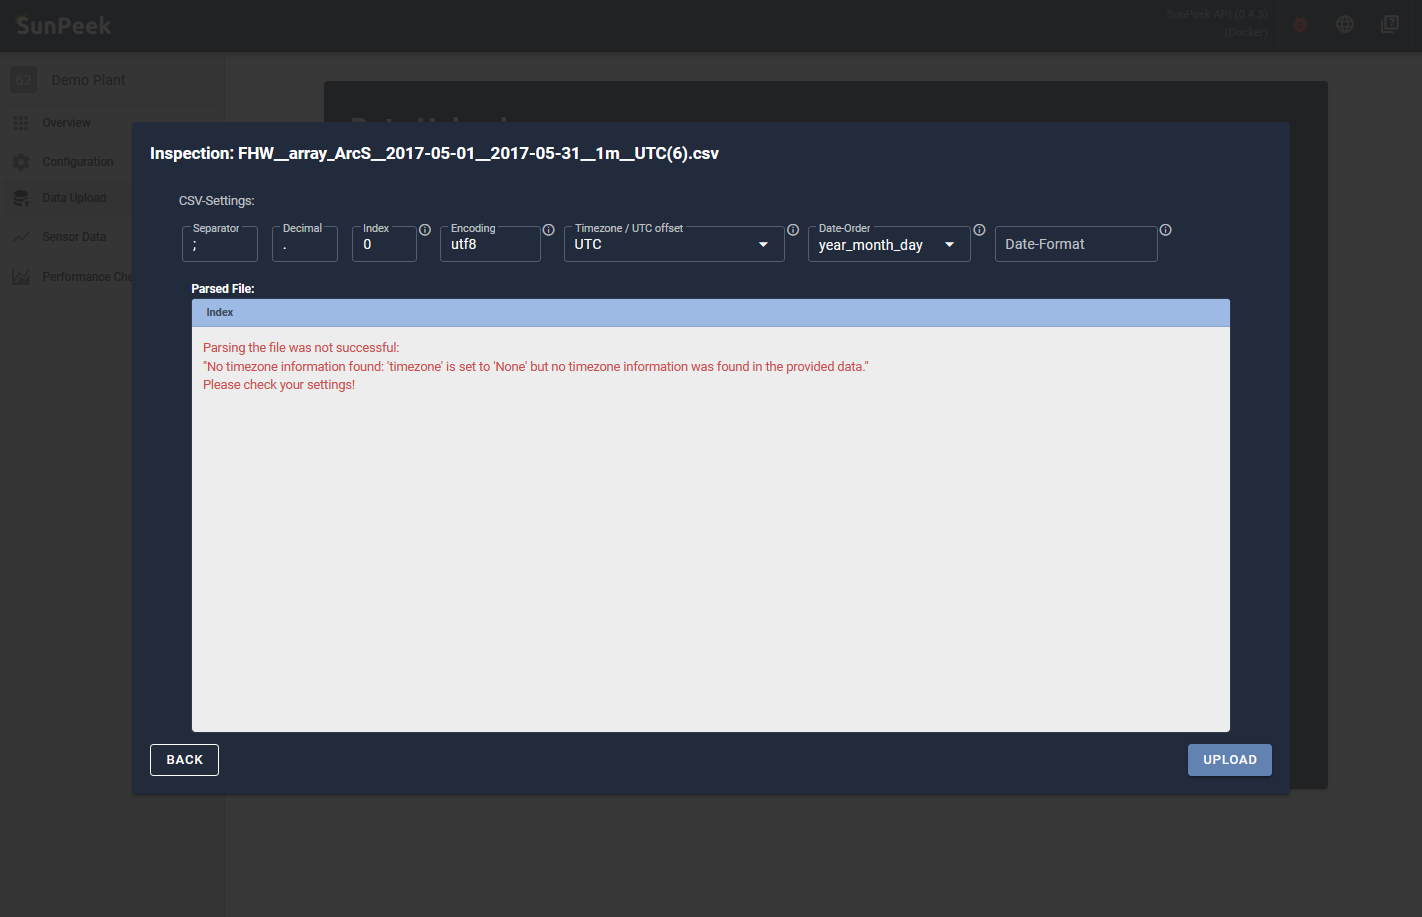
If you click on inspect you will be able to see the parsed file and the error message in a own window overlaying the data upload. Typically, you might need to change some data format settings (e.g. if your data logging has changed). Or you might need to check your file manually (e.g. Notepad++) in case some lines are formatted incorrectly (e.g. missing header in file, bad encodings, etc.).
How to change the data format?#
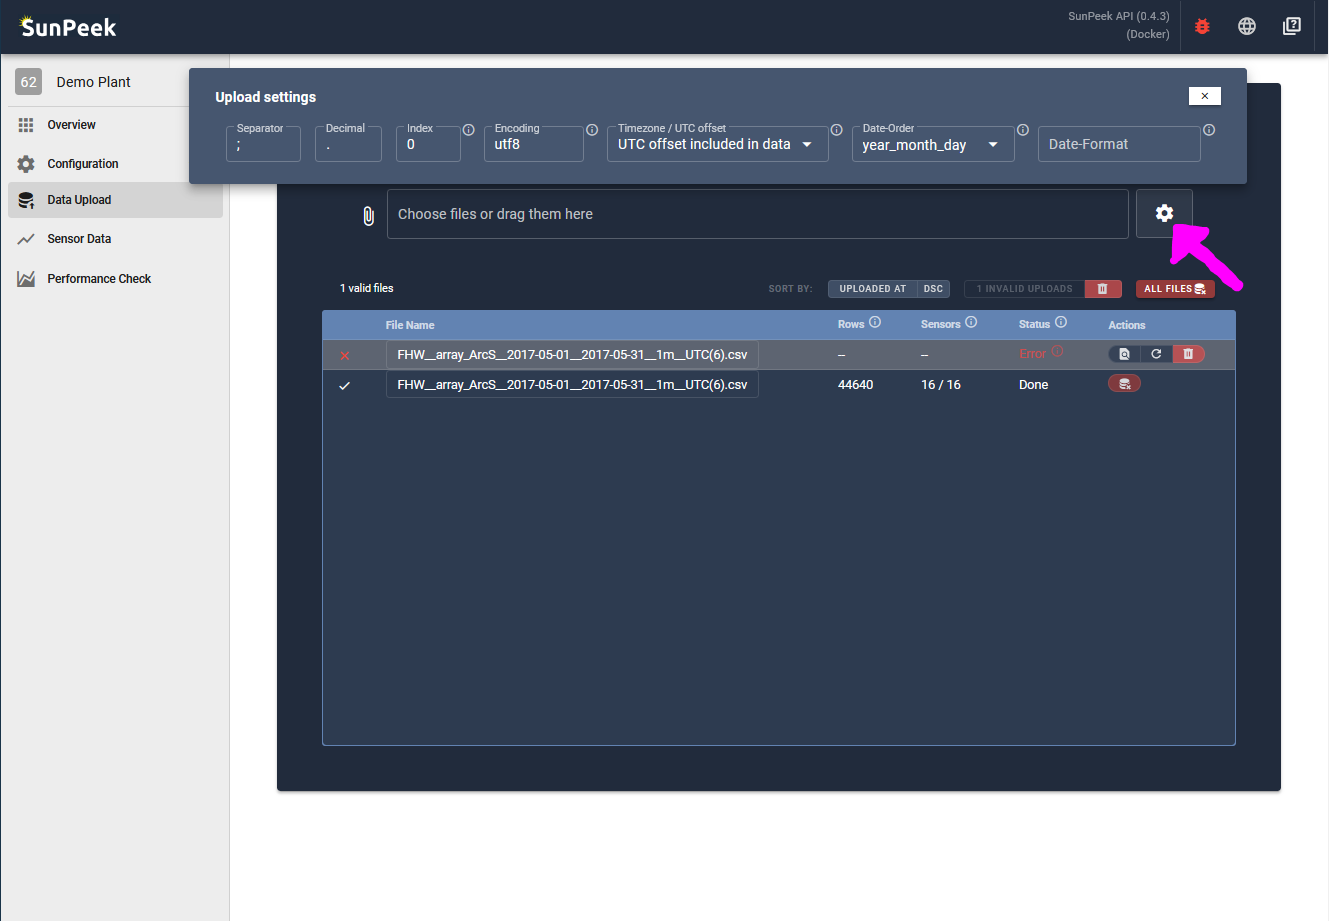
Solar thermal plants have quite a long lifetime, so it is possible that the data logging format might change over time. In this case, it is easy to adapt the data format by clicking on the gear-icon next to the file-input. This will open all the data format options.
How to delete Data?#
Note
Deleting data will only affect the measurement data. The plant configuration, however, will not be deleted. Hence, you can simply drag-and-drop files again to re-upload the measurement data.
Mistakes can happen - so it important that data can be deleted again, in case a bug occured or the wrong file was provided to the SunPeek data upload. Hence, SunPeek provides ways to delete data either completely or file-by-file.
Delete all data
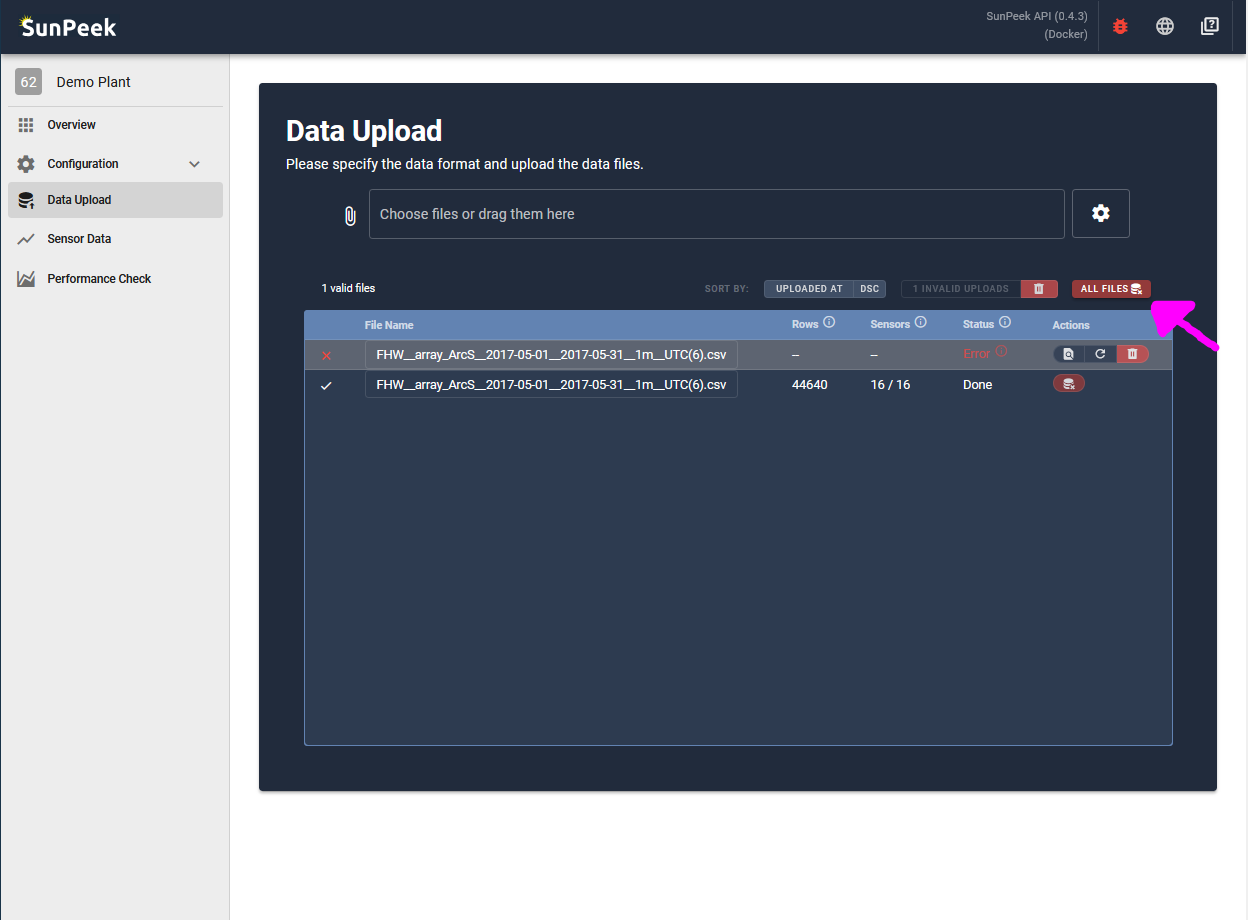
Clicking on the red All Files button, will delete all measurement data in the SunPeek database, and also remove the information about which files have been uploaded.
This option can be a good choice if for some reason the whole database is corrupted (e.g. if you just started uploading and want to start afresh; if you have uploaded a file with incorrect datetime-format and the timestamps are now scattered across multiple months or years)
Delete one file
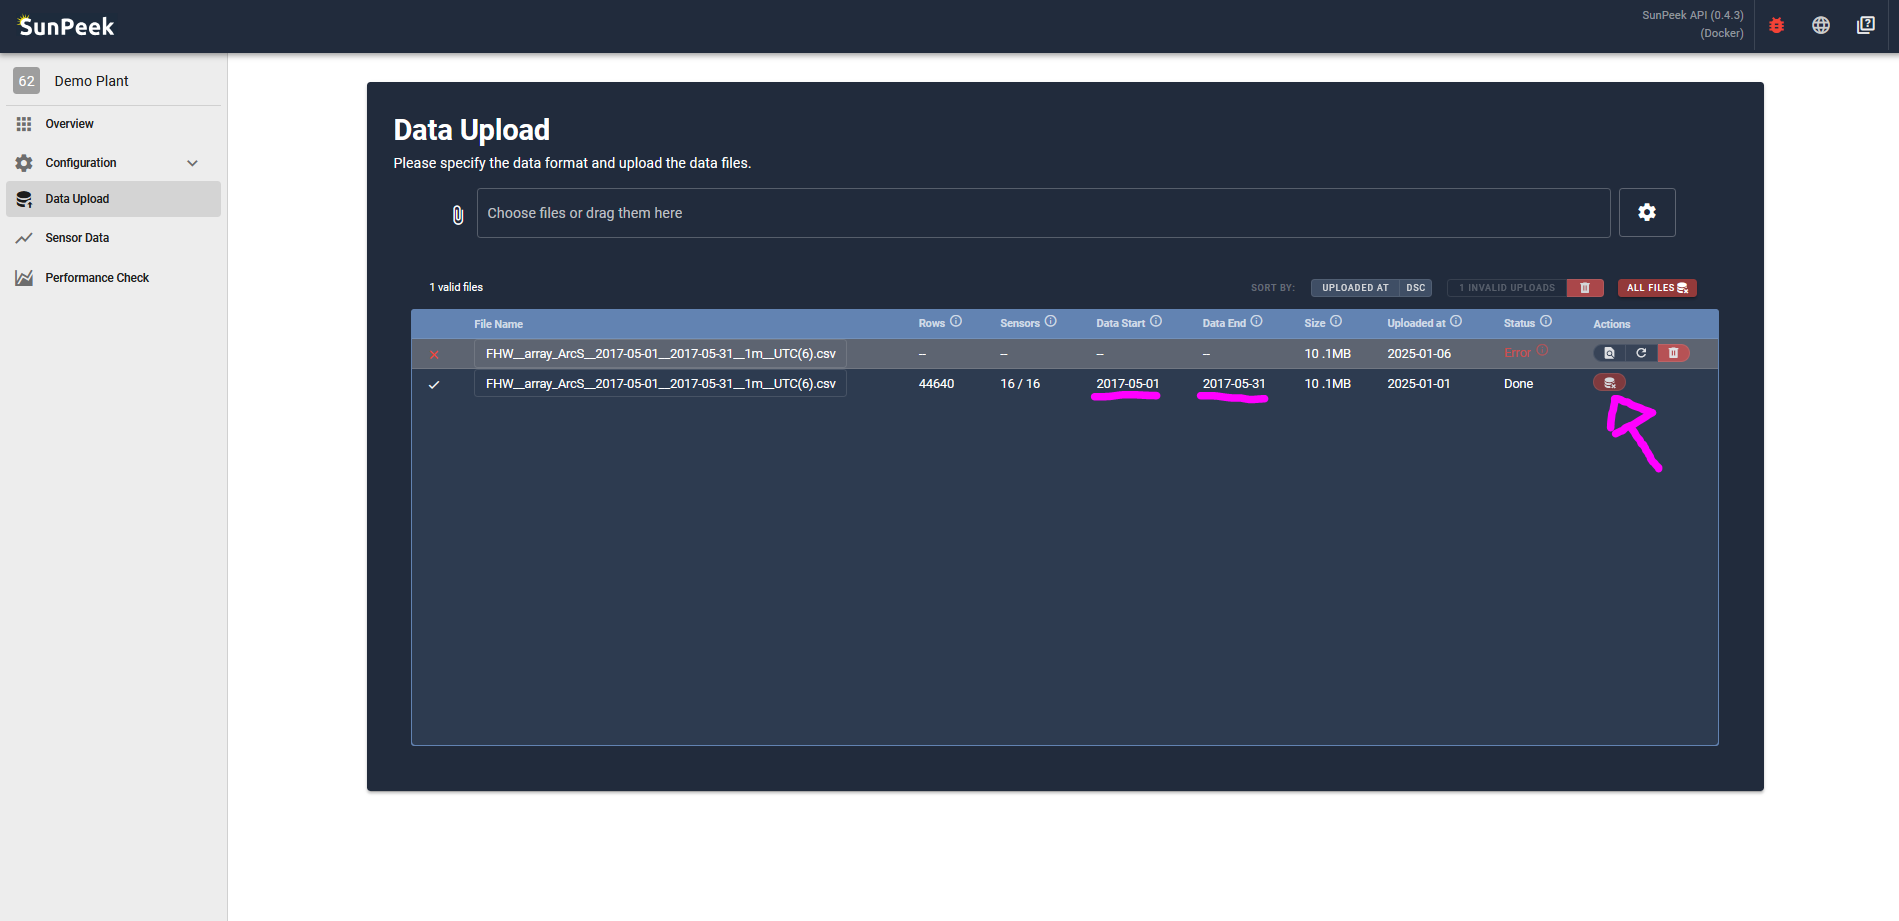
Alternatively, you can also delete measurement data on file-by-file basis. For this, SunPeek uses the parsed Start Date and End Date of the file and deletes all the data inbetween. Hence, in the example in the screenshot above, SunPeek would delete all data between 01.05.2017 and 31.05.2017.
Delete invalid file entries
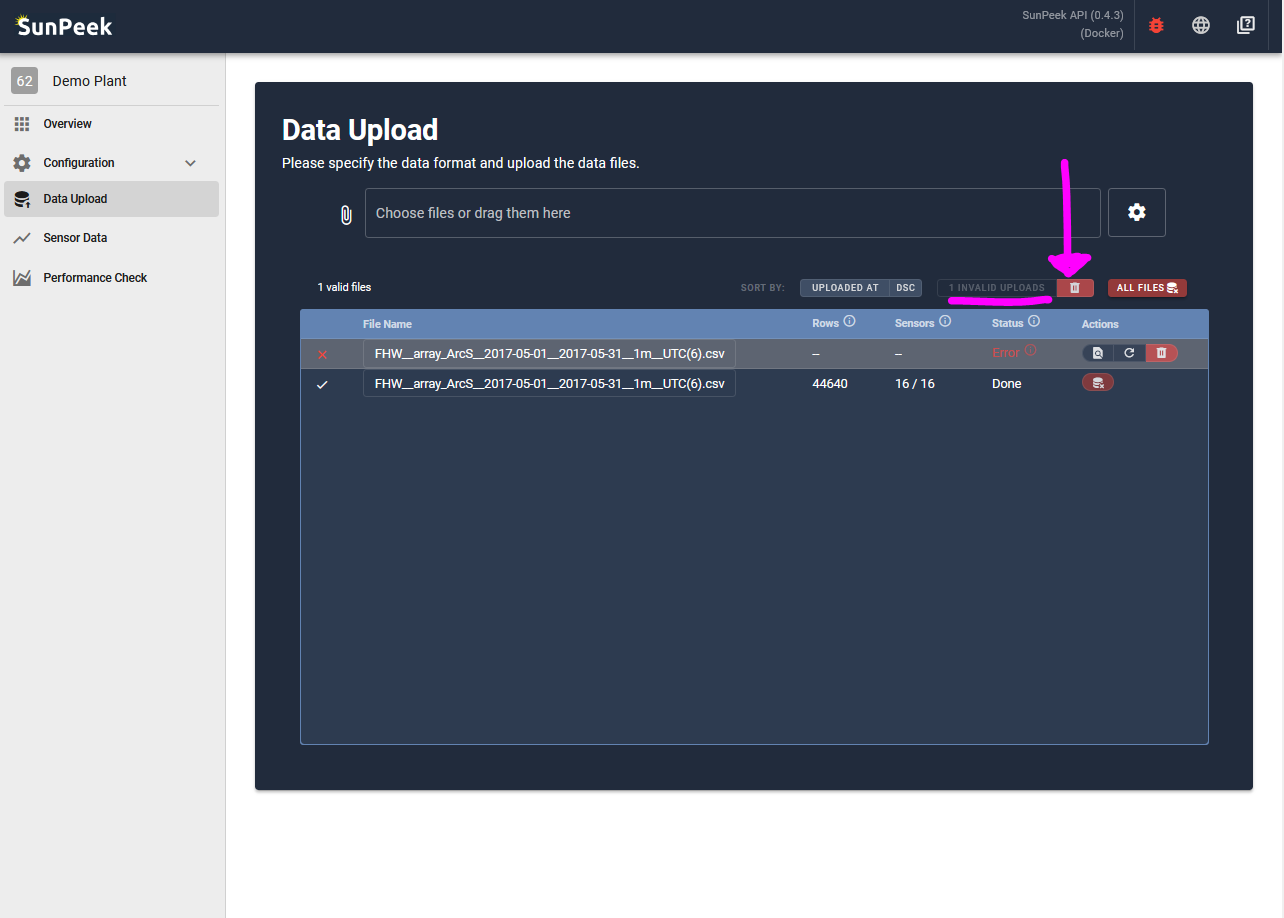
Invalid Files are files that could not get parsed - resulting in an Error. Note that in this case no data was uploaded to the database to begin with This is also reflected by the Data Start and Data End columns, which show no values. Hence, clicking on the delete-Button for an invalid file will only remove the file-entry, but does not remove measurement data.
For convenience, you can also click the trashcan symbol on the toolbar above the list to delete all invalid file entries. Again, this will not delete any actual data.